
Ethernet/IP Setup Guide: Rockwell PLC and KEB Drive – Logix 5000 and COMBIVIS 6
This guide aims to assist you in setting up Ethernet/IP communication between a KEB variable frequency drive and a Rockwell Automation PLC. The first step involves configuring the correct fieldbus protocol and parameter settings in COMBIVIS 6. Once that’s done, you can use Logix5000 software to connect to an Allen Bradley Logix 5000 PLC.
Before we start, ensure you have all the components below to successfully connect the KEB Drive and Rockwell PLC using the EtherNet/IP protocol. EtherNet/IP is a popular choice for industrial automation machines, particularly Rockwell Automation / Allen Bradley PLCs, in the United States.
- KEB USB to Serial Adapter
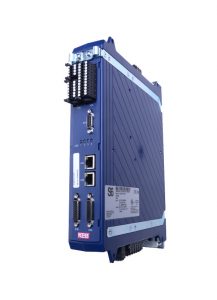
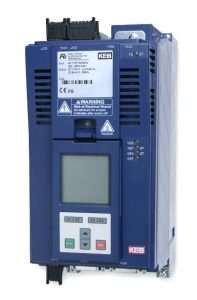
- KEB S6 or F6 VFD
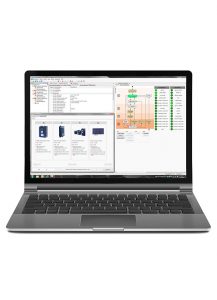
- KEB COMBIVIS 6
– Free Software Download - KEB EDS Files
- Logix 5000 Software
- Allen Bradley Logix 5000 series PLC
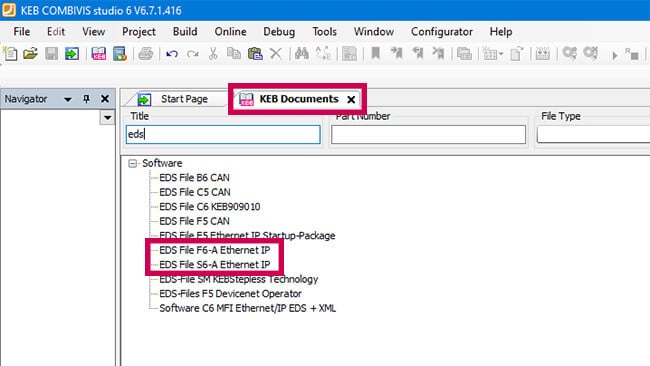
To successfully setup communication with KEB drives in Rockwell Logix 5000 software, download the EDS files from the document database in COMBIVIS 6 (see image below).
Part 1 – EtherNet/IP Setup in COMBIVIS 6
The first step is to connect a KEB device to a computer running COMBIVIS 6 software.
Connect a KEB Drive
Once you open COMBIVIS, click on the “New project” button and select ok. Then, click on the KEB device scan to scan for devices.

Make sure you have the right device selected and click “Add Selected Devices.”

Configure Device Parameters
Click on the “device parameters” tab at the top of the page and scroll down to the “fb” parameters. You need to expand the fb parameters by clicking on the + icon.
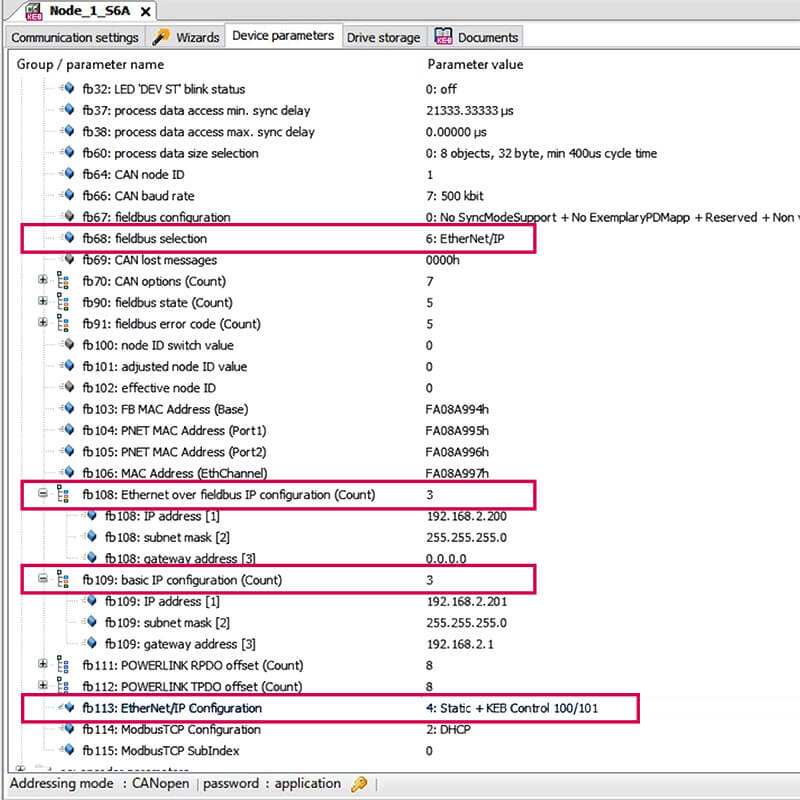
After expanding the fb parameters, find “fb.68” and double-click on this line. In the pop-up window, select Ethernet/IP. Then, scroll down to “fb108” to set up COMBIVIS over Ethernet with the drive, and “fb109” to set up Ethernet/IP communication with the fieldbus.
In fb109, set the IP address and subnet mask of the parameter to work with your network’s IP address. After setting an IP address for the drive, go to fb113, double-click on the text name, and select KEB control in the pop-up window. Once you’ve selected KEB control, press “ok.”
Additional Protocol Configuration Method in Wizards Tab
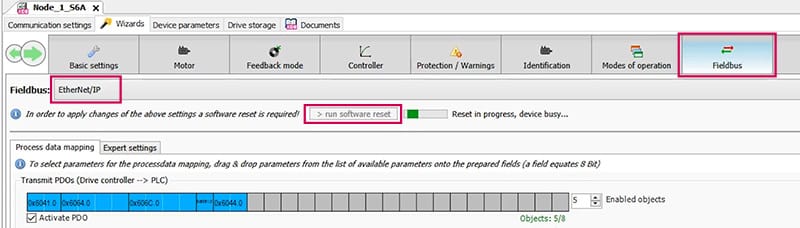
Alternatively, you can select EtherNet/IP communication by going to the “Wizards” tab at the top of the screen. Select “Fieldbus.” At the top of the Fieldbus tab, select Ethernet/IP from the dropdown menu. Next, look at the bottom right-hand side of the window and click on the “stored mappings” button.

Click on the “stored mappings” button. Go to the “Load” folder and in the dropdown menu find “Standard PD mapping F6/H6/S6.” Click “OK” in the popup window. Go to the top of the screen and press the “Run Software Reset” button.
That’s it! These steps should help you configure the drive to an Ethernet/IP PLC in COMBIVIS 6 software.
Part 2 – KEB Drive Setup in Logix 5000
With the EtherNet/IP designated as the communication protocol on the KEB Drive in COMBIVIS 6 you will need to open Logix5000 PLC programming software from Rockwell Automation to setup communication between the KEB drive and the Allen Bradley PLC.
You will need the .EDS file from KEB America to do this setup. Contact us and we will send you the .eds files you need.
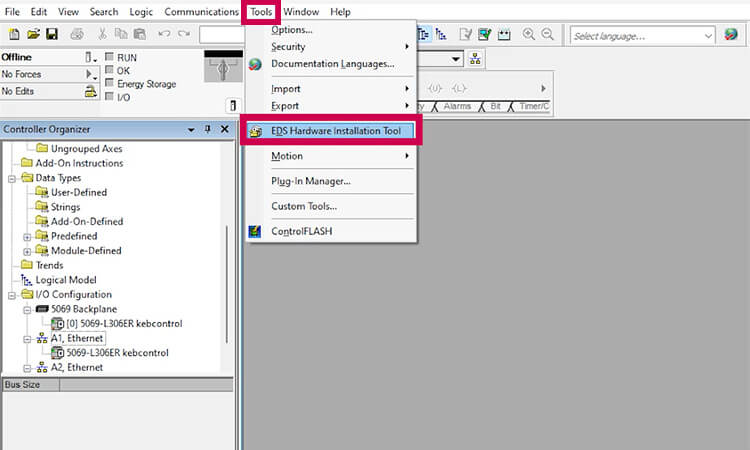
Go to the tools menu and click on EDS Hardware Installation tool. Click “Next” but make sure the “Register an EDS file(s)” is selected before you continue. Click “Next” until you see the screen to browse for the EDS file on your computer. Select the .EDS file and click “Next.” If there are no errors, click “Next.”
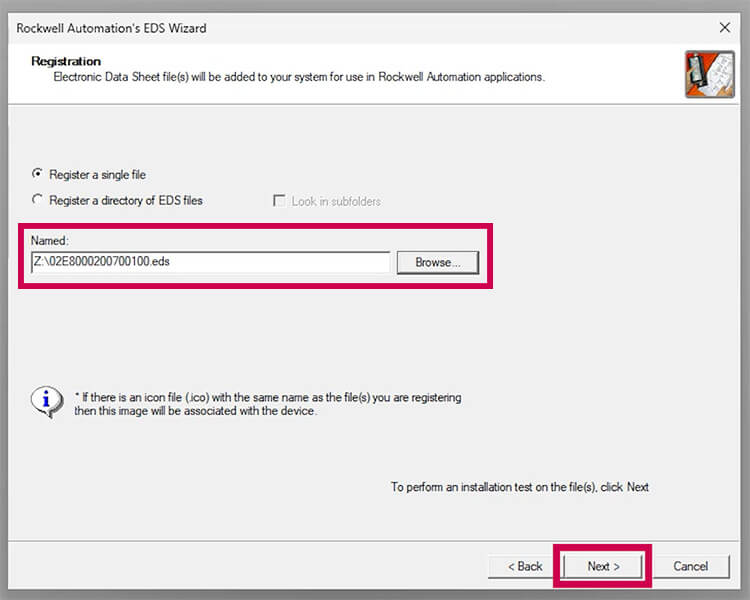
If you see the KEB logo on this screen you can click next until you get to the last screen of the installation and click “Finish.”
![]()
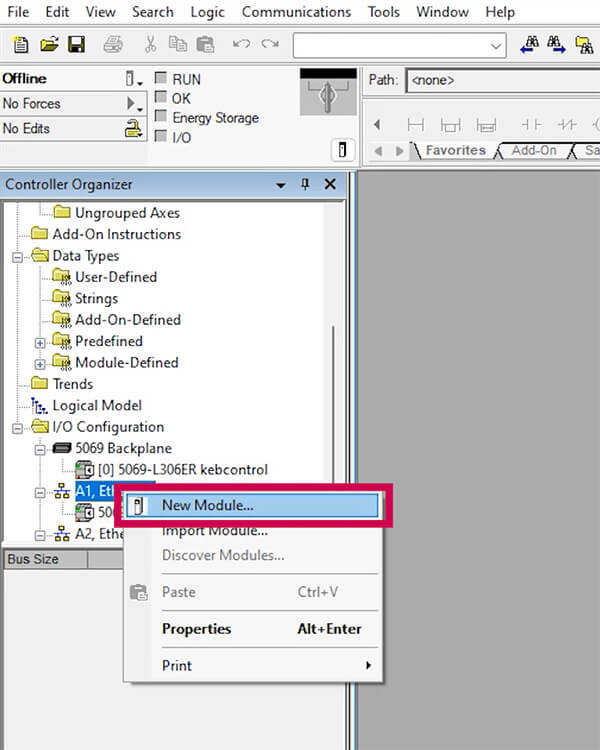
Now that the .EDS file is installed, go to A1, Ethernet in Logix 5000. Right click and select New Module.
Once the “Select Module Type” and search KEB to find the drive you want to connect to the Rockwell PLC.
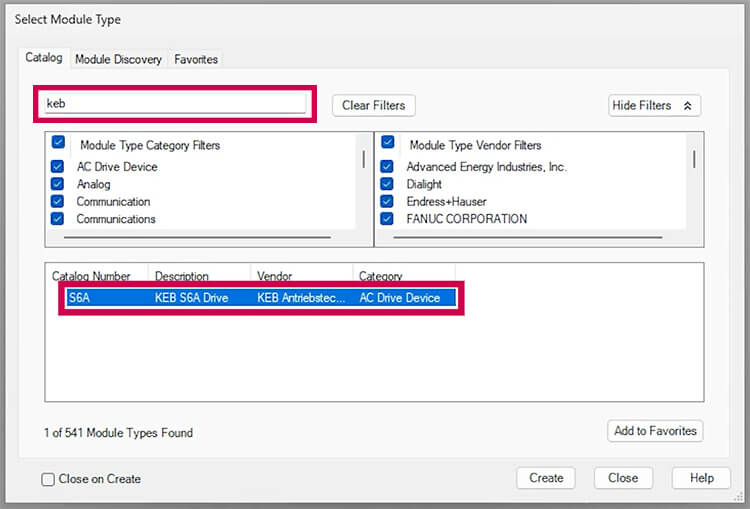
Select the drive you are setting up communication with and press create.
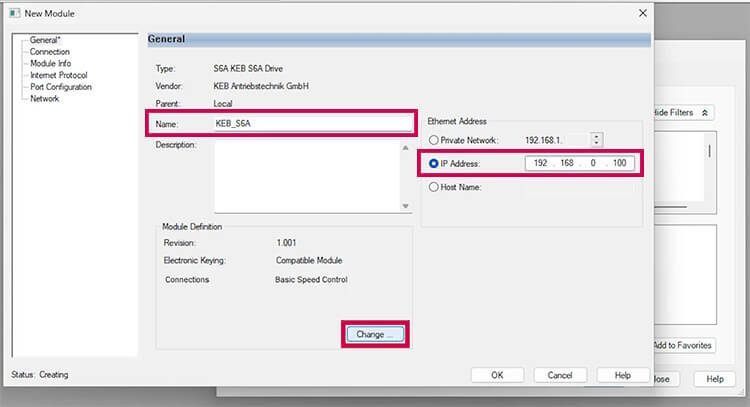
Name the device here. Set the IP address of the drive here to match with the IP address you set for the drive in COMBIVIS under FB 109.
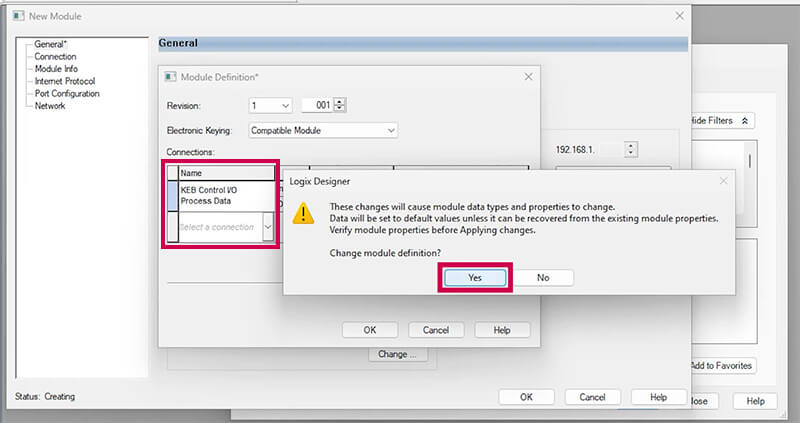
Press change and select KEB control for the drive. Press ok. Select Yes.
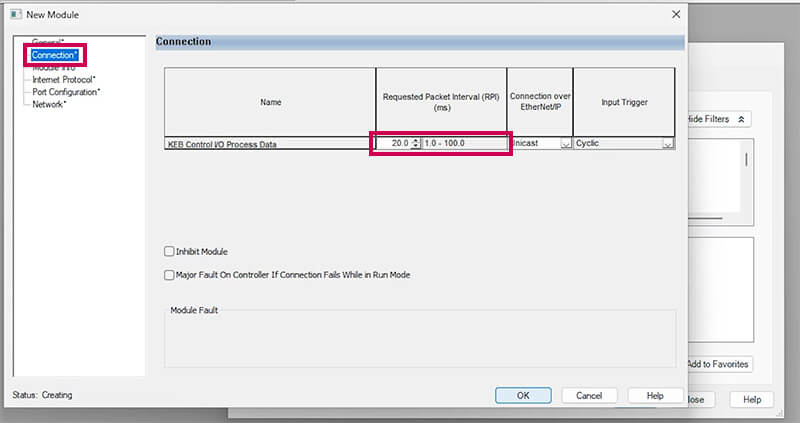
On the left navigation window of the screen, click on “connection” to set your Requested Packet Interval (RPI) and then click “ok.” Once this is completed, click “create” and you are ready to go.
Conclusion
In summary, KEB drives offer valuable flexibility with various communication options and advanced motor control features. Should you have further questions regarding connecting a KEB drive to a Rockwell PLC via EtherNet/IP or KEB automation solutions in general, please don’t hesitate to reach out to us. We’re here to assist you with any questions or needs you may have.
Related Articles

Let's Work Together
Connect with us today to learn more about our industrial automation solutions—and how to commission them for your application.